|
|||||||||||||||||||||||||||||||||||||||||||||||||||||||||||
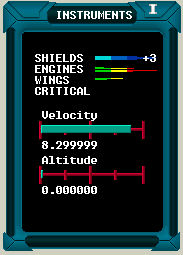 |
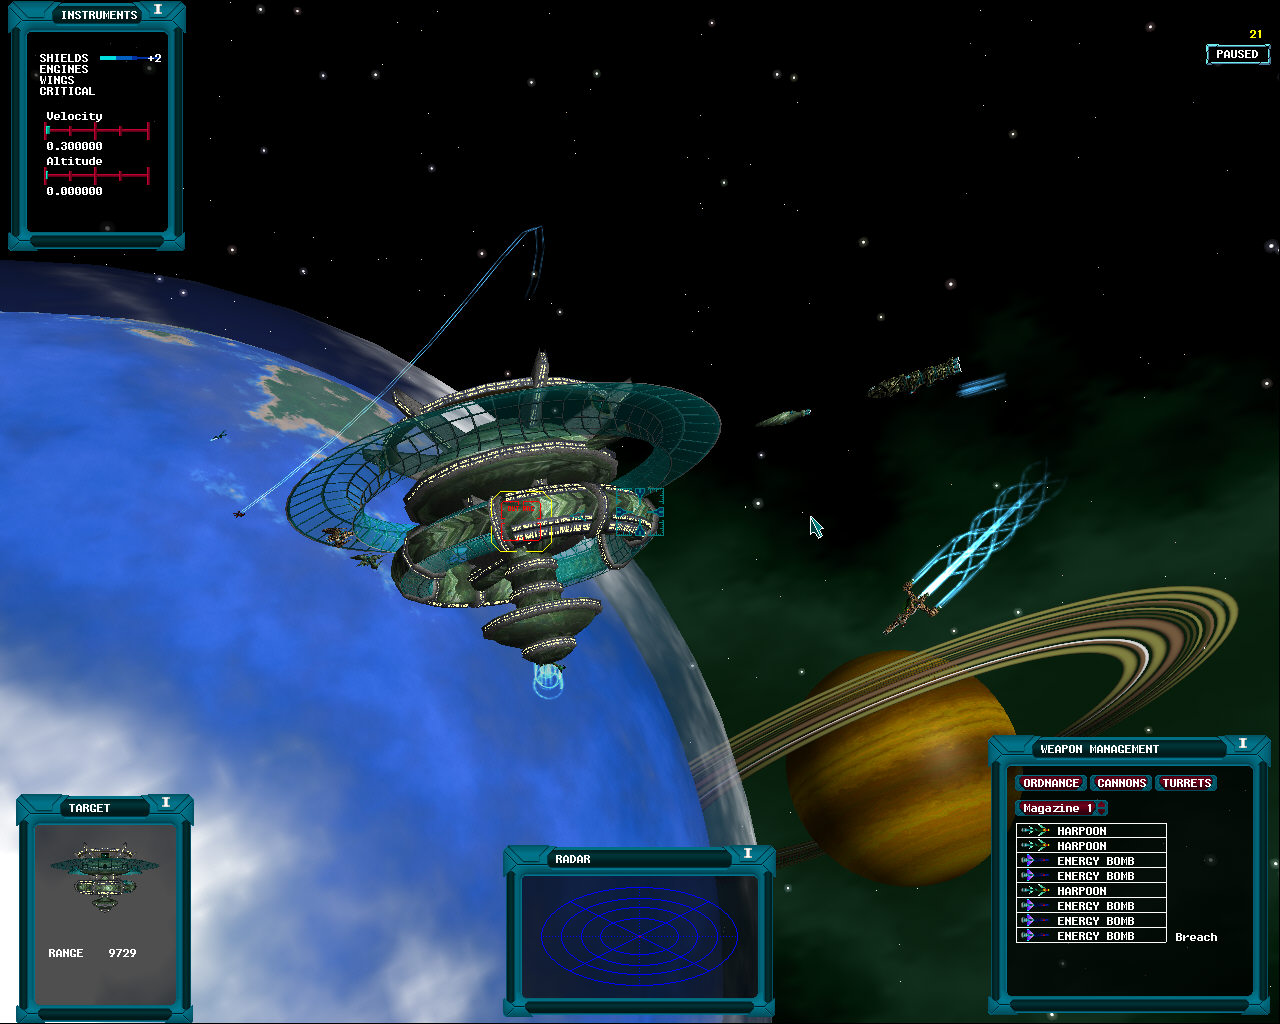
Referring to the Instruments Panel shown on the left, the top area represents a damage report, which gives a summary of the Shield and Component Status. While the Shield Bar is fully extended then full protection against Laser Weapons is afforded. Sometimes a numeral will also appear on the right of a fully extended bar which represents an ‘over-booking’ factor. The figure of ‘+3’ in this example means that the shields are at ‘+300%’ strength. Refer to Section 5.1 for a detailed description of how Shields work. The Damage Report is listed in terms of major systems on a typical ship. Thus there are separate bars for the Engines, Wings and Critical Components. In general several bars will appear per group representing individual subsets of components. If these bars extend into a red area then the item is in danger of being destroyed. The Velocity bar and Altimeter appear beneath the Status area. |
||||||||||||||||||||||||||||||||||||||||||||||||||||||||||
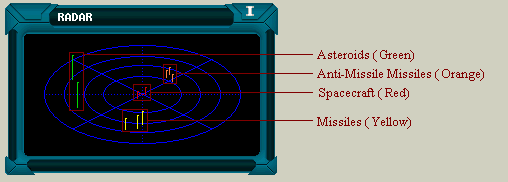
The Radar Scanner displays objects in your immediate vicinity such that your Ship is located at its centre. Objects in front of the Ship will appear in the top quadrant whereas objects behind it appear in the bottom quadrant. Similar rules apply to objects to the left and right of the vessel. In order to convey the height or depth of the object then a line is extended from the object to the plane of the scanner, the longer the line the greater its height or depth relative to your position. |
|||||||||||||||||||||||||||||||||||||||||||||||||||||||||||
 |
|||||||||||||||||||||||||||||||||||||||||||||||||||||||||||
The Targeting window provides information on the selected target which can be a Ship, Space Station, Planet or City. The top area displays the selected object itself and directly below this is a description of its most important aspects. |
|||||||||||||||||||||||||||||||||||||||||||||||||||||||||||
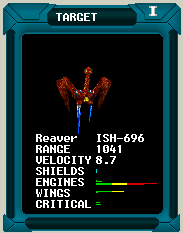 |
The Ship that has been targeted in the window on the left is a ‘Reaver’ with a registration of ‘ISH-696’. Its range and velocity are also shown together with a shield bar and damage report. Notice that at least one engine has been destroyed (the extended line) and that the others have also been severely damaged. In addition damage to the wings and critical systems has also been incurred. |
||||||||||||||||||||||||||||||||||||||||||||||||||||||||||
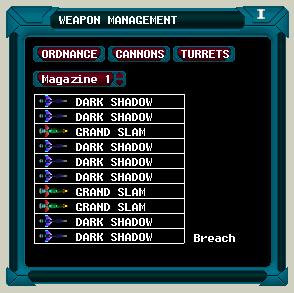
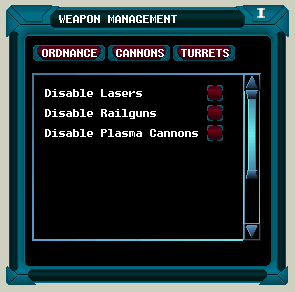
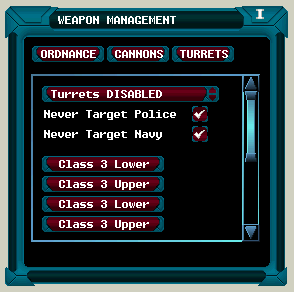
The Weapons Management window as shown in the accompanying illustrations allows the contents of Missile Magazines to be inspected, the cannons to be configured and the turrets targeting policy to be set. Selecting one of the three buttons at the top of the window will cause the relevant information to be displayed. |
|||||||||||||||||||||||||||||||||||||||||||||||||||||||||||
  |
|||||||||||||||||||||||||||||||||||||||||||||||||||||||||||
 |
|||||||||||||||||||||||||||||||||||||||||||||||||||||||||||
If the ‘Turrets’ option is selected then the registration of each spacecraft that is locked into the tracking computer of each of the available turrets is displayed. Also the targeting options described in the following table can also be specified. |
|||||||||||||||||||||||||||||||||||||||||||||||||||||||||||
|
|||||||||||||||||||||||||||||||||||||||||||||||||||||||||||
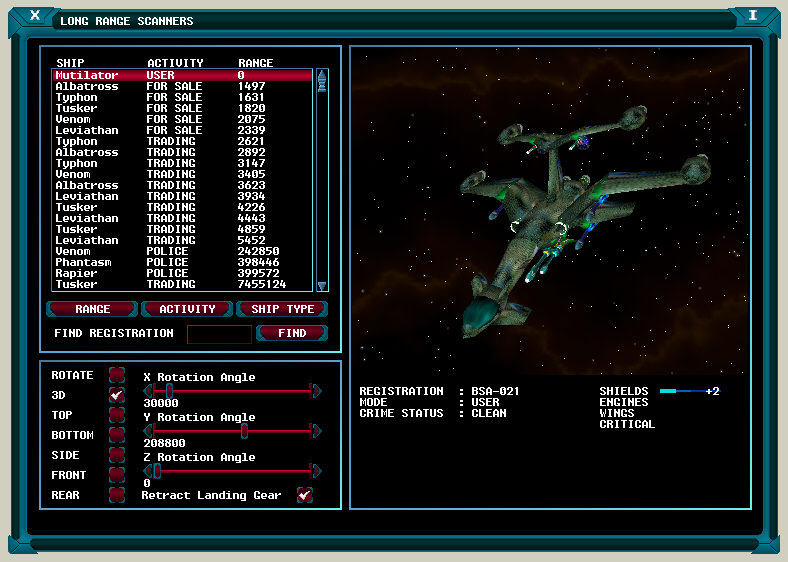 |
The attached Figure displays the Long Range Scanner that can be activated via the ‘L’ key. This displays all the Ships that are present within the current System. The top left hand box corresponds to a list of the ships, whereas to the right lies an area in which the selected vessel is displayed. The bottom left hand area of the window allows the orientation of the selected object to be manipulated. Remember that in order to manipulate items in the Long Range Scanner window then Mouse Control must be suppressed using the ‘Shift’ keys or ‘Right’ Mouse button. |
||||||||||||||||||||||||||||||||||||||||||||||||||||||||||
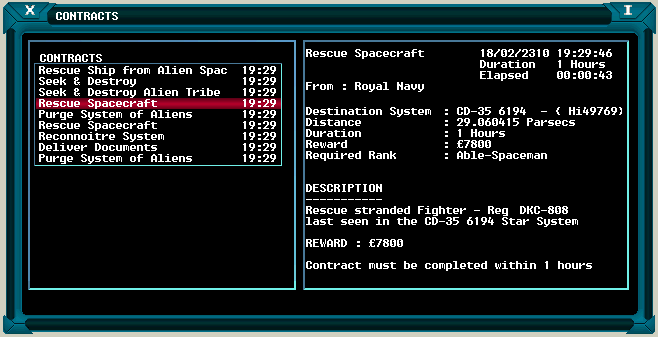
The outstanding Contracts window as shown below can be displayed using the ‘C’. The list on the left can be used to select an item such that its details will be displayed on the right. |
|||||||||||||||||||||||||||||||||||||||||||||||||||||||||||
 |
|||||||||||||||||||||||||||||||||||||||||||||||||||||||||||
The message window as illustrated below possesses a structure and operation that is identical to that of the contracts window. This example shows an itemised Salvage Statement received from a local Space Station. |
|||||||||||||||||||||||||||||||||||||||||||||||||||||||||||
 |
|||||||||||||||||||||||||||||||||||||||||||||||||||||||||||
|
|||||||||||||||||||||||||||||||||||||||||||||||||||||||||||